How Is a Metal Roof Installed From Start to Finish?
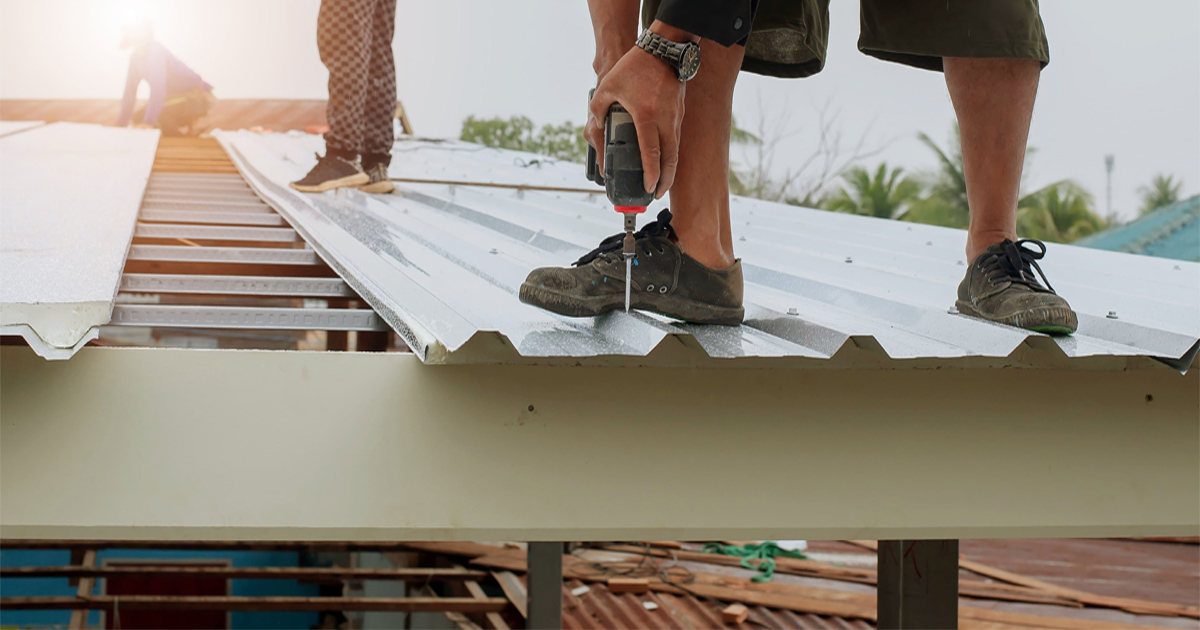
How Is a Metal Roof Installed From Start to Finish?
Table of Contents
- 1. Metal Roofing Starts With a Careful Plan
- 2. Preparing the Roof Before Installation Begins
- 3. How the Metal Roof Installation Process Works
- 4. Installing Metal Roofing Panels and Finishing Details
- 5. What to Expect After the Roof Is Installed
- 6. Frequently Asked Questions
- 7. Key Takeaways
- 8. Making an Informed Decision About Your Roof
- 9. Disclaimer
Have you ever looked at a finished metal roof and wondered how all those panels come together to create a complete roofing system? Metal roof installation involves much more than placing sheets of metal over a home. The process starts with evaluating the existing roof and continues through preparation, underlayment, panel placement, flashing, trim, and a final review.
Understanding those stages can make a roofing project feel much less confusing. It can also help you recognize why seemingly small installation details matter. When seams, fasteners, flashing, or other components are not handled correctly, they can contribute to problems that may develop with a metal roofing system later.
Here is what you need to know about how a metal roof generally goes from preparation to a finished roofing system.
1. Metal Roofing Starts With a Careful Plan
A finished metal roof may look relatively simple from the ground, but a lot needs to happen before the first panel is secured.
The process normally begins with an evaluation of the existing roof. The condition of the roofing materials, roof decking, flashing, edges, valleys, and roof penetrations can influence what preparation is necessary.
This early evaluation matters because a new roofing system depends on the structure supporting it. Covering an existing problem does not make that problem disappear. For example, deteriorated decking may need attention before new roofing materials can be installed over that area.
Measurements are also an important part of planning. Roofers need to account for the dimensions and shape of the roof as well as features such as valleys, ridges, vents, chimneys, skylights, and other penetrations.
The type of metal roofing system also affects the plan. Standing seam roofing, for example, uses a different panel and fastening arrangement than systems with exposed fasteners.
Weather conditions can influence scheduling as well. Roofing work exposes parts of your home during certain stages, so contractors typically consider the forecast when determining when removal and installation should begin.
The important thing to remember is that the visible panels are only one part of the project. Careful planning underneath them helps the entire roofing system work as intended.
2. Preparing the Roof Before Installation Begins
Roof preparation creates the foundation for everything that follows.
Depending on the condition of your existing roof and the planned roofing system, old materials may need to be removed. In other situations, a contractor may determine that a different approach is appropriate after evaluating the existing structure.
Once the working surface is accessible, the roof decking can be inspected more closely. Decking provides the structural surface that supports roofing materials, so damaged, soft, or deteriorated areas should be identified before they are covered.
This stage also gives the roofing crew an opportunity to examine areas that are difficult to see from the ground.
Roof edges, valleys, penetrations, and transitions deserve particular attention because water needs to move safely around or away from these areas.
Preparing the Decking
The working surface should be suitable for the roofing system being installed. Uneven or damaged areas can affect how panels sit and how different components fit together.
Any necessary preparation is easier to address before the finished materials are placed over the roof.
Adding the Protective Layer
Roofing underlayment is typically part of the system beneath the visible roofing material. Its role is to provide an additional protective layer between the finished roof and the decking below.
The specific materials and installation approach can vary according to the roofing system and project requirements. If you want to understand this hidden part of the assembly in more detail, learning why the protective layer beneath a roof matters can provide useful background.
Once the underlying surface and protective materials are ready, work can move toward the components you will eventually see from outside your home.
3. How the Metal Roof Installation Process Works
The metal roof installation process becomes much easier to understand when you think of it as a sequence rather than a single installation step.
Roofers generally work through the project in an organized order so that panels, flashing, trim, and other components fit together as a complete system. The exact approach can vary depending on the roof design, existing conditions, and type of metal roofing being installed.
Setting Up the Starting Points
Before large sections of roofing are placed, installers establish reference points and prepare edges and other important areas.
Accurate positioning matters because the first panels influence the alignment of those that follow. A small alignment issue early in the project can become more noticeable as work moves across the roof.
Roof shape also affects how this stage progresses. Valleys, changes in roof slope, walls, and roof penetrations can require additional planning before the main field of panels is installed.
Positioning the Panels
Metal roofing panels are then positioned according to the particular roofing system.
Panels need to remain properly aligned while maintaining the intended relationship between adjoining sections. The way those panels connect varies depending on their design.
Standing seam roofing commonly uses raised seams where adjacent panels connect. Other systems may use exposed fastening methods. These differences affect how panels are positioned, attached, and joined as work progresses across the roof.
There are measurable differences between metal roofing systems as well. For example, the Insurance Institute for Business & Home Safety explains that common metal roof panels are typically 24 to 36 inches wide. IBHS also notes that factors such as roof-deck material, metal roof material, mean roof height, roof pitch, and geographic location can influence the fastener pattern used for a particular installation.
These details help explain why installers cannot simply use the same panel layout and fastening pattern on every home.
Securing the Roofing System
Metal roof fasteners are another important part of the assembly. Their type, spacing, and placement depend on the roofing system and project conditions rather than one universal fastening rule.
Wind performance provides a useful example of why the entire assembly matters. IBHS describes metal roof assemblies being evaluated using UL 580 followed by UL 1897. For UL 580 testing, a 10-foot by 10-foot roof assembly is subjected to controlled pressures, including five minutes of constant pressure at specified test levels.
This testing looks at the roof as an assembly rather than judging an individual panel or fastener by itself. That distinction is important because the roof decking, panel design, attachment method, fasteners, roof height, pitch, and other conditions all work together.
For you as a homeowner, the practical takeaway is simple. There is no single fastener count, spacing pattern, or panel arrangement that responsibly applies to every metal roof. Those details need to match the particular roofing system and the conditions of the project.
This is why installing a metal roof involves much more than fastening metal roofing panels to roof decking. Careful alignment, appropriate attachment methods, and attention to the complete assembly help each component perform its intended role.
4. Installing Metal Roofing Panels and Finishing Details
Once the main panels begin covering the roof, attention shifts toward connections and finishing details.
These details may look small compared with a full panel, but they can play an important role in how the finished roof handles water.
Panel Seams
Panel seams are the points where sections of the roofing system meet.
Their exact design depends on the type of metal roof. Some systems conceal much of their fastening hardware, while others leave certain fasteners visible.
Correct alignment helps the roof maintain a consistent appearance while allowing the system to function according to its design.
Roof Flashing
Roof flashing helps manage water around areas where the roofing surface changes direction or meets another structure.
You commonly find flashing around chimneys, walls, vents, valleys, and other roof penetrations. These areas require careful attention because water can collect or change direction around them.
The flashing needs to work with the surrounding panels rather than behave like a separate patch added afterward.
Ridge and Edge Details
The highest point where roof slopes meet usually requires a ridge cap or another system-specific finishing component. Roof edges also need appropriate trim and finishing details.
These pieces help complete transitions between roofing surfaces and exposed edges.
The result should look intentional because the different components were planned to work together from the beginning.
5. What to Expect After the Roof Is Installed
Finishing the last panel does not necessarily mean the entire project is finished.
A final review gives the roofing crew an opportunity to examine completed work and check important details. This can include panel alignment, flashing, trim, penetrations, edges, seams, and other visible components.
The work area also needs attention. Roofing projects involve packaging, removed materials, cutoffs, fasteners, and other construction debris, so cleanup is part of bringing the project to completion.
You may also receive information about the materials that were installed and any maintenance considerations that apply to your particular roof.
This is a good time to ask questions. If something about the finished system is unclear, asking while the project is fresh can help you better understand what you are looking at.
Homeowners considering a roofing project can also benefit from understanding what professional roofing work may involve for homeowners before making decisions about their own property.
Remember that every house is different. Roof pitch, complexity, existing conditions, weather, accessibility, and the chosen materials can all influence how a project progresses.
Frequently Asked Questions
How long does it usually take to install a metal roof?
There is no single timeline that applies to every home. Roof size, pitch, complexity, existing conditions, weather, accessibility, and the type of metal roofing system can all affect how long the work takes.
A relatively straightforward roof may progress differently from one with numerous valleys, dormers, skylights, chimneys, or other penetrations. Preparation can also add time if underlying materials need attention before the new roofing system can be installed.
Does the old roof always have to be removed first?
Not necessarily. The appropriate approach depends on the existing roofing system, its condition, the structure underneath it, and the requirements of the new system.
An evaluation is important because problems beneath an existing roof may not be obvious from the ground. The goal should be to understand what is already there before deciding how the new roofing materials will be installed.
What goes underneath metal roofing panels?
The complete assembly can include roof decking and roofing underlayment, along with other materials appropriate for the particular system.
The exact configuration is not identical for every property. Roof design, existing conditions, material selection, and installation specifications can affect what is used beneath the finished panels.
Why are flashing and roof penetrations important during installation?
Openings and transitions interrupt the otherwise continuous surface of a roof. Vents, chimneys, skylights, walls, and similar features create areas where water needs to be carefully managed.
Flashing and related components help direct water around these vulnerable areas. That is why installers pay close attention to them rather than treating them as minor finishing details.
Can homeowners inspect the finished work themselves?
You can observe many aspects of the finished roof safely from the ground, but climbing onto a roof introduces fall and injury risks.
If you have concerns about seams, flashing, panels, or another part of the completed system, it is safer to have a qualified roofing professional evaluate those areas. You can still ask questions and request explanations about what was installed without physically accessing the roof yourself.
Key Takeaways
A metal roof is a system of interconnected components rather than a collection of panels placed over a house. Understanding the basic stages can help you follow a roofing project and ask more informed questions.
- Installation starts with evaluating the existing roof and planning around its shape and condition.
- Roof decking and protective materials need attention before the finished panels cover them.
- Panel alignment, fastening methods, seams, flashing, penetrations, edges, and ridge details all contribute to the completed system.
- The exact process can vary according to the type of metal roofing being used and the conditions of the home.
- A final review and cleanup are important parts of completing the project.
Most importantly, do not judge the quality of a roofing project only by how the panels look from the street. Many of the details that affect the finished system are underneath the visible surface or concentrated around transitions and penetrations.
Making an Informed Decision About Your Roof
Understanding how a metal roof is installed gives you a clearer picture of what happens between the first evaluation and the final review. Preparation matters just as much as the visible panels, while details such as underlayment, seams, flashing, fasteners, penetrations, and trim all need to work together.
That knowledge can also make conversations about your roofing project easier. Instead of focusing only on the finished appearance, you can ask about preparation, materials, attachment methods, and how important roof details will be handled.
If you are considering a new roof and want to better understand the professional options available for your home, you can explore roofing services to learn more.
Disclaimer
This article is intended for general informational purposes only and should not be considered professional construction, engineering, financial, insurance, or legal advice. Roofing methods and requirements can vary based on the property, roofing system, manufacturer specifications, existing conditions, and other project-specific factors.
Installing a roof involves working at height and using specialized materials, equipment, and techniques. Homeowners should not rely on this article as step-by-step DIY installation instructions. A qualified roofing professional should evaluate your property and recommend an appropriate installation approach based on its specific condition.