
What to Expect During a Lap Siding Installation Project
What to Expect During a Lap Siding Installation Project
Table of Contents
- 1. Why Proper Installation Matters
- 2. Lap Siding Installation
- 3. What Happens Before Installation Begins
- 4. Understanding the Siding Installation Process
- 5. Common Challenges During Installation
- 6. What Happens After the Installation Is Complete?
- 7. FAQ
- 8. Key Takeaways
- 9. Start Your Siding Project with Confidence
- 10. Disclaimer
If you’re planning to update your home’s exterior, it’s completely normal to have questions about what the process involves. A Lap Siding Installation is more than simply attaching new siding to your house. Every stage, from preparation to the final inspection, helps determine how well your new exterior performs for years to come.
Understanding what happens before work begins can help you feel more confident throughout the project. You’ll know what your contractor is doing, why each step matters, and what you can expect as the installation progresses. If you’re considering professional siding services, learning about the process beforehand can make it much easier to plan your project with realistic expectations.
Whether you’re replacing worn siding or giving your home a fresh new look, knowing what happens behind the scenes helps you appreciate the craftsmanship that goes into creating a durable, attractive exterior.
1. Why Proper Installation Matters
When homeowners think about new siding, they often focus on color, style, or material. While those choices certainly influence your home’s appearance, the installation itself plays an equally important role in protecting your investment.
Proper installation creates a complete exterior system that works together to protect your home from moisture, changing weather conditions, and everyday wear. Even high-quality materials cannot perform as intended if they’re installed incorrectly.
Good installation also helps your siding maintain its appearance over time. Proper alignment, secure fastening, and careful finishing around windows, doors, and corners all contribute to a clean, professional result that continues to look great long after the project is finished.
Another important benefit is long-term performance. Taking the time to complete each step correctly can reduce the likelihood of future repairs, helping you enjoy your home’s updated exterior with greater peace of mind.
2. Lap Siding Installation
One reason many homeowners choose lap siding is its classic appearance. The overlapping horizontal design has remained popular for decades because it complements a wide range of home styles, from traditional neighborhoods to newer residential developments.
Although the finished product may appear simple, installing it requires careful planning, accurate measurements, and close attention to detail. Every piece must fit together correctly so the exterior functions as a complete weather-resistant system rather than a collection of individual siding panels.
A professional installation also involves much more than securing siding to the outside walls. Installers consider drainage, ventilation, expansion, material spacing, and transitions around architectural features. These details help improve both durability and appearance while supporting the overall performance of the home’s exterior cladding.
Because every property is different, experienced installers adjust their approach based on the home’s design, existing conditions, and the type of materials being installed. This helps create a finished exterior that not only looks attractive but also performs reliably throughout changing seasons.
3. What Happens Before Installation Begins
Many homeowners are surprised to learn that a successful project begins well before the first siding panel is installed. Preparation is one of the most important stages because it creates the foundation for everything that follows.
Inspecting the Existing Exterior
The first step is evaluating the home’s current condition.
During this inspection, installers look for visible signs of damage, aging materials, moisture concerns, or areas that may require attention before new siding is installed. They also examine windows, doors, trim, and other exterior features that connect to the siding system.
Identifying these issues early allows them to be addressed before they become hidden behind the new materials.
Measuring the Home
Accurate measurements are essential for ordering the correct amount of material and planning the installation efficiently.
Measurements account for every wall, window, doorway, corner, and roofline. This planning helps reduce unnecessary material waste while minimizing delays once work begins.
It also allows installers to organize the project so each stage flows smoothly from one step to the next.
Preparing the Property
Before installation starts, homeowners may notice crews preparing the work area.
This often includes:
- Protecting nearby landscaping.
- Moving outdoor furniture when necessary.
- Creating safe access around the home.
- Positioning equipment and materials.
- Covering surfaces that could be affected during construction.
These preparations help keep the project organized while reducing the chance of accidental damage around the property.
Choosing Materials That Fit Your Home
Selecting the right material is another important part of the planning process. Different siding products offer their own balance of durability, maintenance requirements, and visual appeal. If you’re still comparing your options, it may be helpful to learn which lap siding options offer the best combination of durability and curb appeal before making your final decision.
4. Understanding the Siding Installation Process
Once preparation is complete, the installation can begin. While every home presents unique conditions, most projects follow a similar sequence that allows the new siding system to perform as intended.
Removing Existing Siding
If older siding needs to be replaced, it is carefully removed before the new materials are installed.
This provides access to the wall structure underneath and allows installers to inspect areas that are normally hidden from view.
Removing the existing materials also helps ensure the new siding is installed on a stable, properly prepared surface.
Inspecting the Wall Structure
With the previous siding removed, the wall sheathing becomes visible.
Installers inspect it for signs of deterioration, moisture damage, or other concerns that should be addressed before installation continues.
Repairing these issues now helps create a stronger foundation for the new weather-resistant siding and reduces the likelihood of hidden problems developing later.
Installing the Moisture Barrier
One of the most important stages of the project involves protecting the home before the new siding is attached.
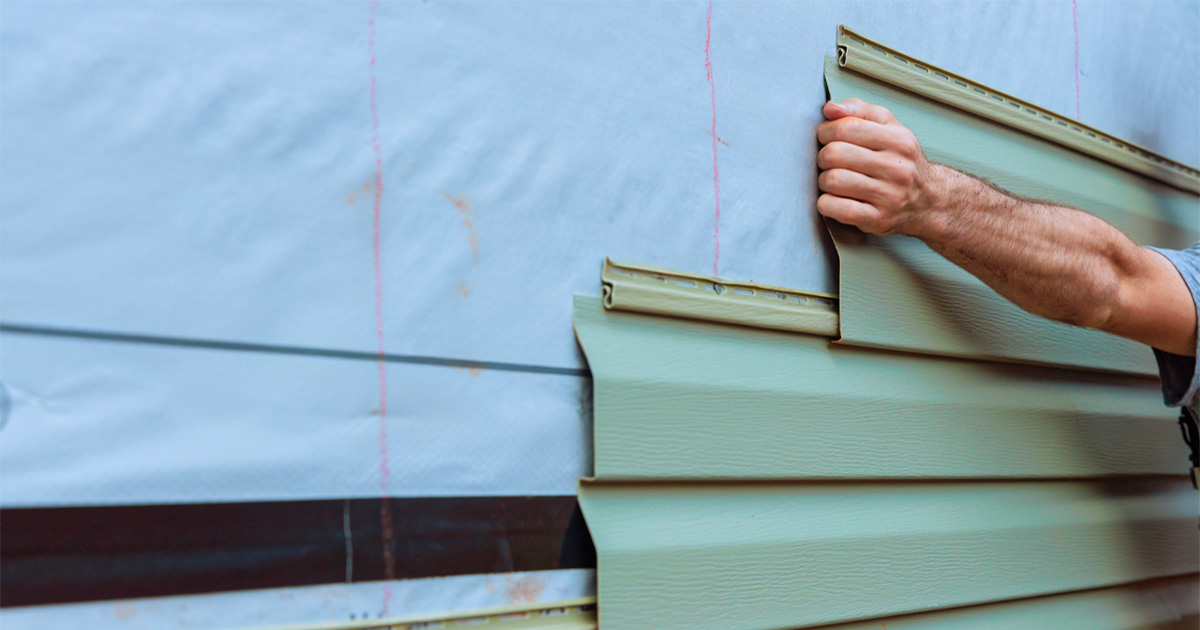
A properly installed house wrap acts as a moisture barrier that helps manage water while allowing the wall assembly to function properly. Installers also complete flashing installation around windows, doors, and other openings where water could potentially enter if not protected correctly.
Although these components remain hidden after installation is complete, they play a major role in protecting your home’s exterior wall protection for years to come.
Installing the New Siding
With the wall prepared, installers begin attaching the new siding according to the manufacturer’s recommended installation methods.
Each section is carefully aligned to maintain consistent spacing and create clean horizontal lines across the home’s exterior. Attention is also given to corners, joints, and transitions to produce a finished appearance that is both attractive and durable.
As the project progresses, you’ll begin to see your home’s transformation take shape, with each row contributing to a finished exterior that improves both protection and curb appeal.
Finishing Details
Once the main siding has been installed, attention turns to the finishing components.
These may include siding trim, corner boards, and soffit and fascia where needed. These finishing touches complete the exterior while helping create smooth transitions between different parts of the home.
Homeowners often notice that these details give the project its polished appearance, even though they also contribute to the overall performance of the siding system.
5. Common Challenges During Installation
Even when a project is carefully planned, unexpected situations can arise once work begins. Experienced installers know how to adapt while maintaining quality workmanship and keeping the project moving forward.
Knowing about these possibilities ahead of time can help you understand why some projects take slightly longer than expected and why flexibility is sometimes necessary.
Hidden Structural Concerns
Older homes occasionally have issues that aren’t visible until the existing siding has been removed.
For example, installers may discover damaged sheathing, minor moisture intrusion, or aging materials that no longer provide adequate support for the new siding. While these findings can temporarily extend the project timeline, addressing them before installation continues helps create a stronger and longer-lasting exterior.
Ignoring hidden damage simply because it cannot be seen would likely create larger problems later.
Weather Conditions
Since siding work takes place outdoors, weather always plays a role.
Heavy rain, strong winds, or severe storms may require installation to pause until conditions improve. While homeowners naturally want the project completed as quickly as possible, working during unsuitable weather can affect both safety and installation quality.
Allowing the weather to cooperate helps ensure every stage is completed under appropriate conditions.
Material Adjustments
No two homes are exactly alike.
Even with accurate measurements, installers occasionally need to make minor adjustments around windows, doors, rooflines, or architectural details. These custom cuts help create a finished appearance that looks clean and professionally installed.
Taking extra time to achieve a precise fit often leads to a better-looking result.
Unexpected Schedule Changes
Most projects follow the planned schedule, but certain situations may require adjustments.
These can include:
- Deliveries arriving later than expected.
- Additional repairs discovered during installation.
- Temporary weather delays.
- Changes requested during the project.
Open communication helps homeowners understand what is happening and why certain adjustments may be necessary.
6. What Happens After the Installation Is Complete?
Once every siding panel has been installed, the project enters its final stage. This is where installers make sure everything has been completed correctly before considering the job finished.
A Thorough Cleanup
Construction naturally creates debris, packaging materials, and leftover supplies.
Before leaving the property, installers typically remove excess materials, clean the work area, and inspect the surrounding landscape for any remaining debris. The goal is to leave your property looking neat while allowing the new siding to become the main focus.
Final Inspection
A final walkthrough allows both you and the installer to review the completed project together.
During this stage, you’ll have the opportunity to ask questions, understand any maintenance recommendations, and become familiar with the finished work.
Rather than simply looking at the siding from a distance, take time to walk around your home and examine the details. Clean corners, properly aligned siding panels, and neatly finished trim are all signs of quality workmanship.
Maintaining Your New Exterior
Although today’s siding products are designed to provide years of dependable performance, regular care helps preserve both appearance and durability.
Simple maintenance includes:
- Washing dirt and debris from the exterior when needed.
- Keeping gutters clear so water drains properly.
- Trimming nearby tree branches.
- Inspecting the exterior after severe weather.
- Addressing small concerns before they become larger repairs.
Developing a simple maintenance routine helps protect your investment for years to come.
If you’re considering updating your home’s appearance after completing your siding project, you may also enjoy exploring exterior design ideas that complement different architectural styles before planning your next exterior improvement.
If you’re researching similar projects in your area, you can also find out what homeowners should know before starting a local siding project to better understand what goes into planning a successful installation.
FAQ
How long does a siding installation project usually take?
The timeline depends on several factors, including the size of your home, the condition of the existing exterior, weather conditions, and the type of siding being installed. Many residential projects are completed within several days, although larger or more complex homes may require additional time.
Do installers always remove the old siding first?
Not always, but removing the existing siding is often recommended because it allows the wall structure to be inspected before new materials are installed. This helps identify hidden issues and provides a solid foundation for the new exterior.
What happens if damage is found behind the siding?
If moisture damage or structural concerns are discovered during the project, repairs are typically completed before installation continues. Addressing these issues early helps improve the long-term performance of the new siding.
Will I need to leave my home during the installation?
Most homeowners remain in their homes throughout the project. While there may be construction noise during working hours, installation usually does not require you to move out unless other major renovations are taking place at the same time.
How can I prepare my property before installation begins?
Clearing outdoor furniture, trimming landscaping near exterior walls, securing fragile decorations, and providing clear access around the home can help the installation process proceed more efficiently.
Key Takeaways
- Proper preparation is just as important as the installation itself.
- A careful inspection helps identify hidden concerns before new siding is installed.
- Moisture barriers, flashing, and finishing details all contribute to long-term durability.
- Minor delays caused by weather or unexpected repairs help ensure quality workmanship.
- Routine maintenance helps your new siding continue performing and looking its best for years to come.
Start Your Siding Project with Confidence
Knowing what to expect before work begins can make a siding project feel much less overwhelming. Understanding each phase of the installation process allows you to communicate more effectively with your contractor and make informed decisions throughout the project.
If you’re ready to learn more about professional siding services, exploring your options can help you determine the best approach for your home’s style, condition, and long-term goals.
Disclaimer
This article is intended for general informational purposes only and should not be considered professional construction, engineering, or legal advice. Every home is different, and installation methods may vary depending on the property’s condition, local building requirements, material selection, and other project-specific factors. Always consult a qualified siding professional for recommendations based on your home’s individual needs.